Stitched Ruffled Flower Clip
Since my daughter is a little fashionista, she needs a bow to coordinate with every outfit! (When I say "she needs' I mean "mommy needs" since she's only 9 months). So below I have the steps to make a stitched ruffled flower clip bow to go with the lady bug outfit I made her. Enjoy!
Supplies
Ribbon (I prefer grosgrain)
1-1 1/2 inch ribbon cut to a length of 16 inches
1-7/8 inch ribbon cut to a length of 14 inches
1-3/8 inch ribbon cut to a length of 12 inches
Ruler
Scissors
Hot glue gun
Wood burner
Alligator clip
Needle & Thread
Fabric stiffener ( I use liquid spray starch)
Step 1: Cut your Ribbon
Take each ribbon individually and lay on measuring bored and measure each ribbon to lengths specified above. Use the wood burner tool to heat the edges of the ribbons so they don't fray.

Step 2: Thread your needle
This part is not shown because I figured that threading a needle is pretty simple. However I will say that you need to coordinate the color of your thread color with the color of your ribbon so you don't see it when its stitched. I always keep the thread attached to the spool and cut when I'm done stitching so I will always have a long enough piece of thread.
Step 3: Stitch your ribbon
Choose ONE side of your ribbon and hand stitch a simple straight stitch all along the single side of the ribbon.

Since I was making a bow for my daughter I used the same color thread.
Step 4: Making the "ruffles"
Once you have stitched the thread all the way to the end of the ribbon its time to start ruffling! Cut the spool end of the thread making sure to leave a good amount of thread, then remove the needle from the needle side. Take both pieces of thread in one hand and push the ribbon to the center to make your ruffles. The more to the center you push the tighter your ruffles will be. Once you have the desired amount of 'ruffle" tie the two pieces of thread together TIGHTLY. Make sure you have the knot as close to the ribbon as possible and cut the ends close to the ribbon. I also like to use liquid no-stitch to seal the stitch. You will have the ends of the ribbon puckering out so use the hot glue gun to glue the ends together but make sure you glue them on the side you want to be the bottom of the flower.


Step 5: Other ribbons
Do steps 2-4 with the other two cuts of ribbon
Step 6: Attaching flowers to the clip
Take your lined alligator clip and place a line of hot glue down the middle. Quickly, before it dries, place the large bottom flower on the clip and press down to attach it. Then place a line of hot glue on the bottom side (the side closes to the center) of the large flower and place your center flower on it, repeat with the top flower.

Step 7: Add your center
This step is optional, unless your center ruffle isn't tight and there's a hole in the center of the ribbon. Choose a center for your flower, it can be a jewel, a letter, etc; take a look at the scrapbooking section of your local craft store for ideas. Place a dot of hot glue in the center and push on your center piece.
Step 8: Starch
This part is very important. If you don't starch your bow it can get droopy and squished, which after all this work would make me cry. Place the bow on a piece of cardboard, and make sure you're in a well ventilated area. Spray a heavy layer of starch all over the bow, making sure to get in between the ruffles. If your center piece is plastic or metal you can wipe the starch off, if its fabric then you need to leave it on. Let the starch dry this can take up to 15 minutes depending on the amount of starch used. And now you have a beautiful stitched ruffle bow!

Simple Folded Bow
So this bow is really simple to do and really quick. I think its a good bow to start with because it is so simple and helps you get a "feel" for bow making. I put this bow on a french barrette but you can easily put it on an alligator clip or on a headband as well.
Supplies:
5/8 inch grosgrain ribbon cut to 14 inches in length. (The picture shows two because I was making a set for pigtails).
5/16 inch grosgrain ribbon cut to 2 1/2 inches in length
Ruler
Wood burner tool to heat treat the ends
Hot glue gun
Crafting wire
Scissors
French Barrette or Alligator clip
Center piece (optional)
Stiffener
Step 1: Cut your ribbon
Measure your ribbon and cute it to lengths.

Step 2: Burn the ends. (No picture)
Once your wood burner is hot carefully burn both ends of the ribbon so they wont fray.
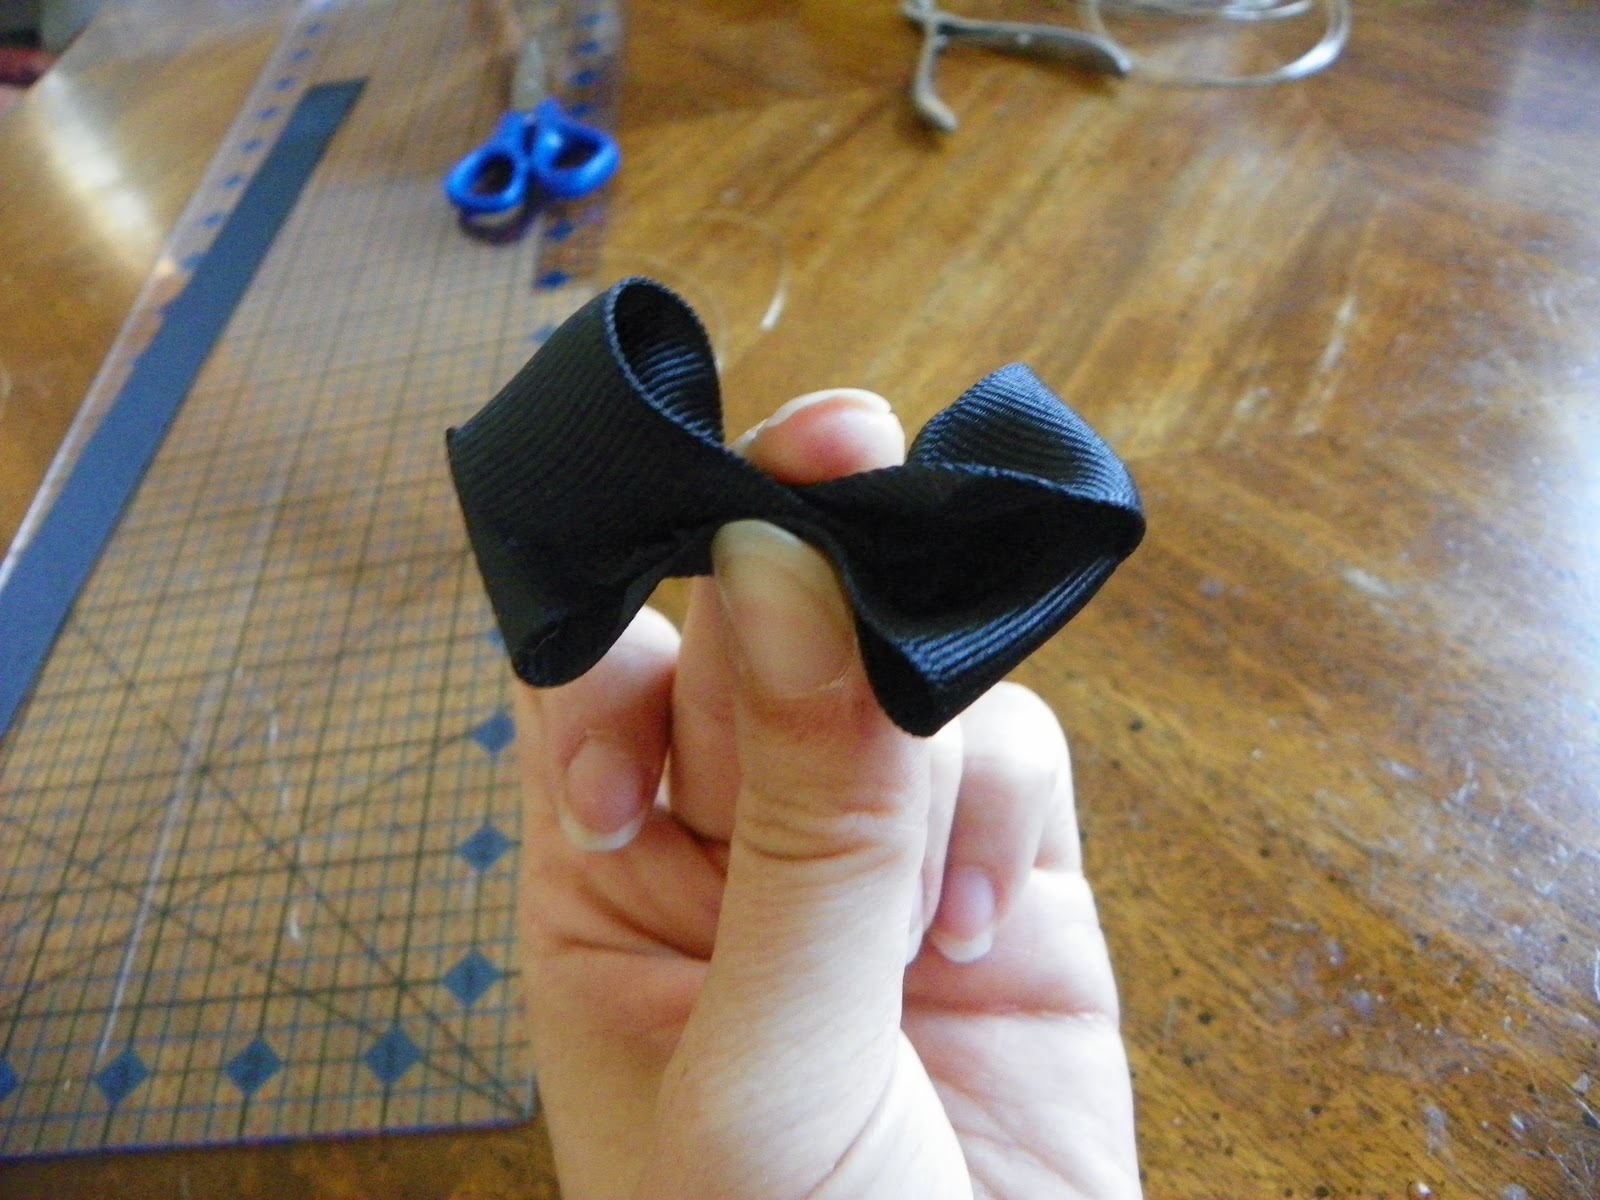
Step 3: Fold your ribbon
Carefully fold your ribbon into even lengths four times, making sure that the final fold doesn't leave any extra sticking out. This is where your bow is going to come from.

Step 4: Tie the bow
Now holding the folded ribbon in one hand take your cut crafting wire and wrap is around the center of the ribbon. Make the wire tight enough so when you remove your hand from the ribbon the folds stay in place, but not so tight that you can't adjust the ribbon. Once the wire is wrapped, gently pull out the ends of the ribbon at the folds to make four "loops".

Step 5: Cover the wire
Now take the 2 1/2 inch cut strand and with your glue gun glue the ribbon tightly around the wire to cover it. Make sure the ribbon is TIGHT.

Step 6: Put on the center piece
If you've decided to do the center piece this is when you would put it on. I used a leaf button for this bow. If you're using a button as a center, make sure to cut the button part off of the back of the button so it will lie flat on the bow.

Step 7: Glue bow on to barrette
Take the barrette (or alligator clip) and run a line of hot glue all over the top of the barrette. Quickly, before the glue dries, place the bow on the barrette and push down. I like to push the loops of the bow down so the backs get glued down and stay in place. Once the bow is in place spray generously with liquid starch. Remember to wipe off the center piece.
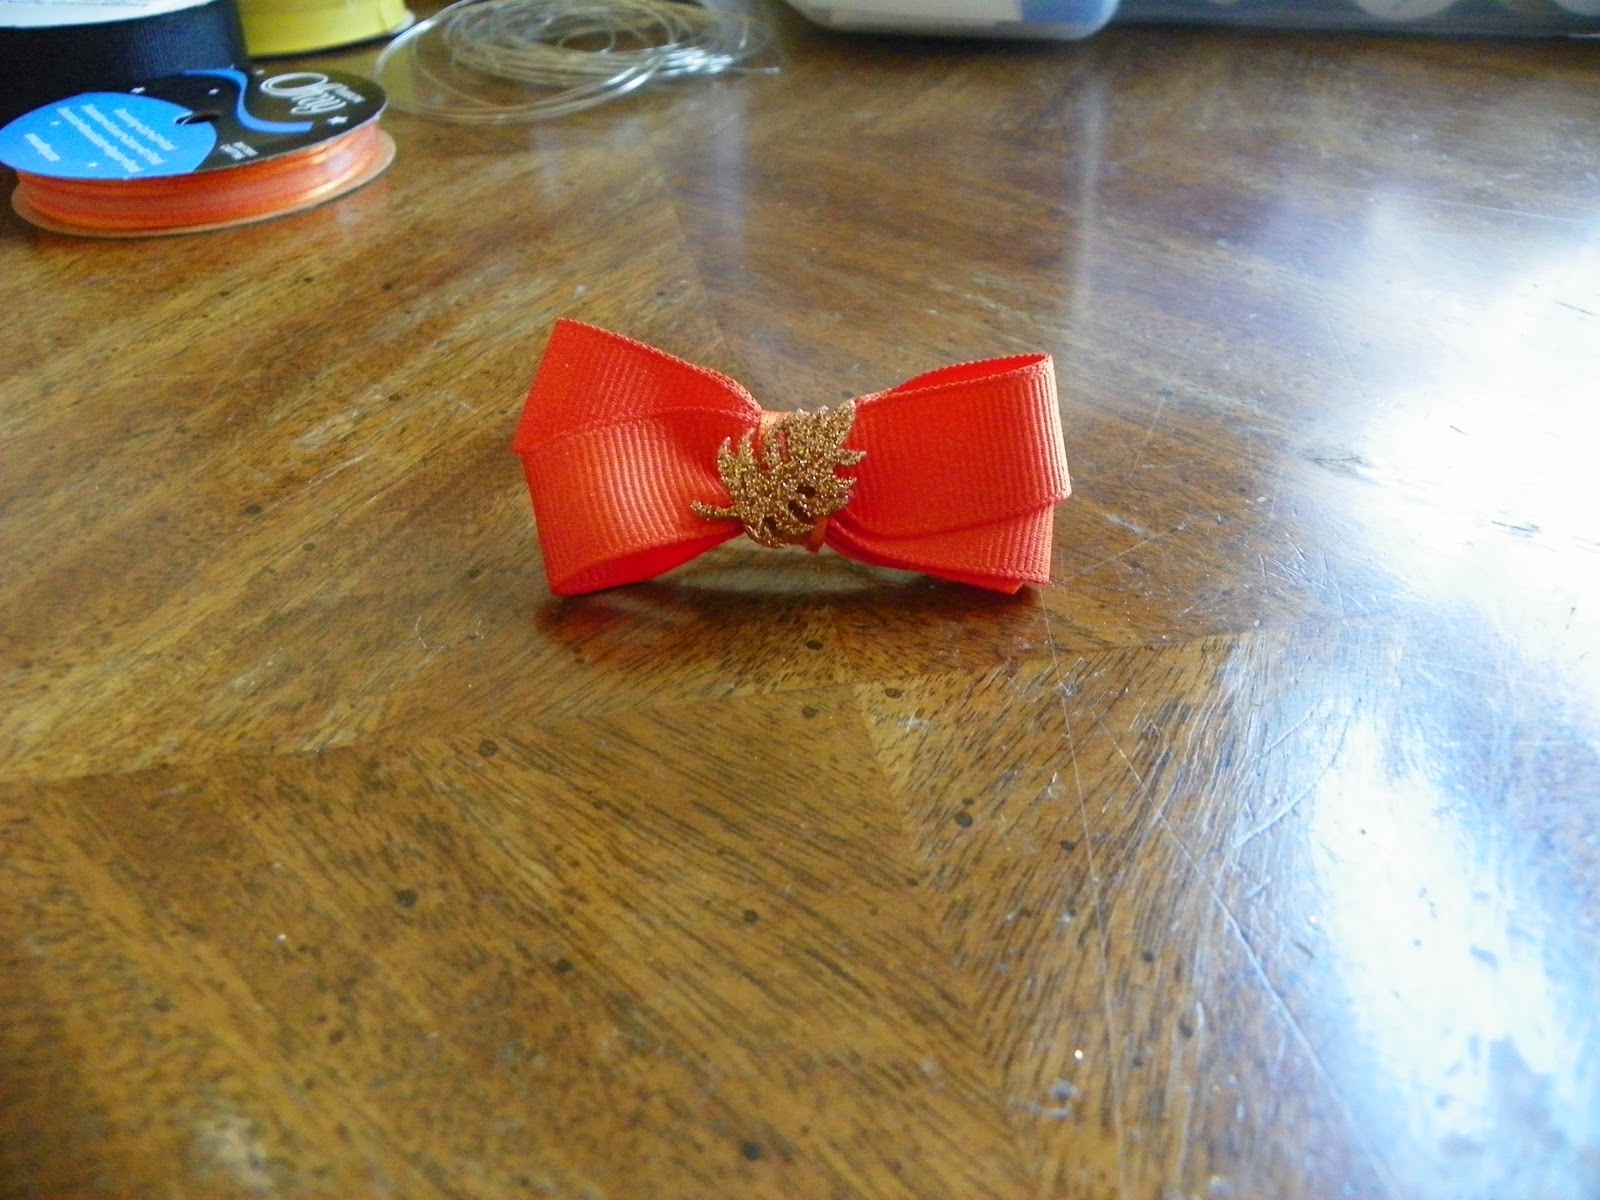
Boutique Bow
Boutique bows are a little more complicated than the simple folded bow and tend to have a little more flare. They are great on clips by themselves (like the bow shown in the instructions) or placed as a center in a more elaborate bow.
Supplies:
7/8 inch grosgrain ribbon cut two 14 inches
5/16 inch grosgrain ribbon cut two 2 1/2 inches
Wood burner
glue gun
scissors
Ruler
Crafting wire
Center piece (optional)
Barrette (or alligator clip)
Liquid Starch
Step 1: Cut the ribbon
Cut the ribbon to 14 inches in length.

Step 2: Burn the ends
Take the wood burner and burn both ends of the ribbon so your bow won't fray. (Not pictures)
Step 3: Fold the ribbon in half
Take your ribbon and fold it length wise end to end in half, making sure to push the center so you'll get a crease when you open it.

Step 4: Fold the ribbon
Take one end of the ribbon and fold it to the center crease, twisting the end of the ribbon so that the back of the ribbon is touching the crease, and glue it down. Do the same for the other end, the ribbon should look like an eight.


Step 5: Gather the ends
In this step you are going to gather the looped ends of the ribbon in the center. You gather them by pushing the center of each loop to the center of your ribbon and holding them there. Make sure that the four ends that are produced are even.

Step 6: Gather again and tie with wire
Now this is were it gets tricky and this is were the practice is needed ( I went through TONS of ribbon before I got it right so don't get frustrated). While still holding the center with the gathered loops, push the center of the ribbon together tightly and tie it with the crafting wire. Tie the wire tight enough to hold the ribbon in place but loose enough so you can adjust the four loops to the fullness you want.

Step 7: Cover the wire and Attach your center piece
Now glue your 2 1/2 inch length of ribbon around the wire with the hot glue gun. If you've decided you want to have a decorative center item once the cover ribbon is on you will glue it to the center of the ribbon.

Step 8: Glue ribbon to Barrette
So now take your barrette (or alligator clip) and place a generous amount of hot glue down the center, and push the ribbon on the barrette. I like to press the center and the actual loops down so the loops are secured in place. Spray with heavy starch remembering to wipe off the center piece. And you have a boutique bow!!!
