Designing An Applique
In my perpetual quest for cute things for my daughter (and fun things for me to do) I have begun to make custom clothing for her. And in this quest I have found that sometimes craft stores just don't have what I'm looking for... especially when it comes to the design and size of appliques. So I decided to make my own... this ensures that I get exactly what I want for my design AND it saves me money in the long run, which always makes me, and my husband, very happy. So here are the steps to making your own appliques.
Supplies:
You’ll first need basic sewing necessities like a sewing machine, scissors, thread, needles, pins, etc. In addition, you will also need:
- A regular pencil
- Plain or tracing paper
- An iron
- A water or air soluble marking pen or pencil
- Paper backed iron-on adhesive,
- Tear away stabilizer, I prefer the kind you can iron-on
- Fabrics for the applique, prelaundered as the finished product will be laundered.
Step 1: Draw you applique Design;
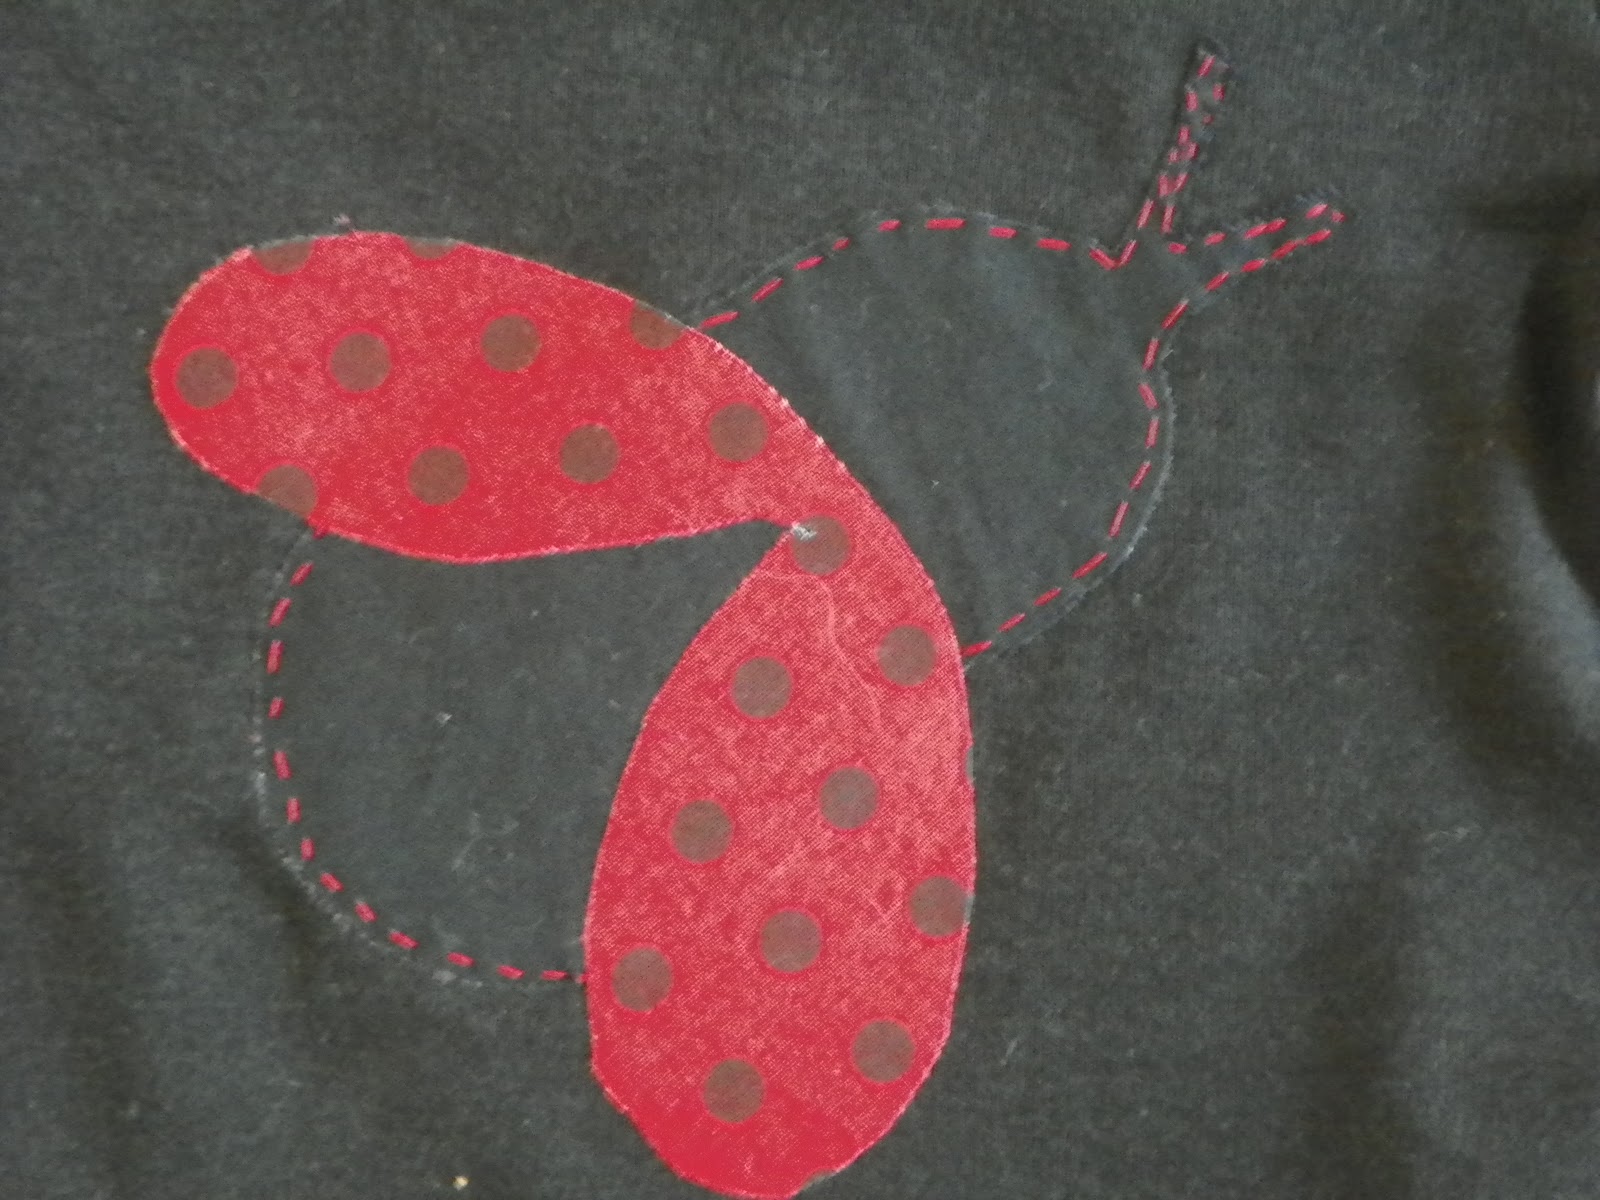
The first thing you need to do is to design your applique. A simple design with straight sides is easiest for beginners, so consider starting with something like a star or simple house. If you’re an experienced seamstress (or plan on sewing by hand) you may want to try a design with curves, like a heart. I’m working on a lady bug design for one of my daughter's outfits in the examples.
Either draw your design on the plain paper, or trace the design onto the tracing paper. Make sure to make your lines DARK. Keep in mind that the finished applique will be a mirror image of your tracing, this is especially important if you're adding lettering... I learned this the hard way and it was absolutely devastating!

Step 2: Trace onto the iron on adhesive
Place the iron-on adhesive on top of your design, paper side up (look at the instructions for your adhesive, some have paper on both sides but only one side comes off easily. Trace the design on the side that DOESN'T come off easily), and trace your design onto the adhesive. If your design is made up of more than one element, like the lady bug, you will need to trace each section separately. (see pictures below).
If there are sections next to each other, you need to decide which will go on top of the other. When tracing, extend the line of the bottom section about 1/4 inch where it touches the top one. This will allow you to layer the sections so there won’t be any gaps in between them (this is VERY important).

The body of the lady bug will got on the bottom so I extended the edges.

The wings will go on the top
Step 3: Rough cut the design
After your design pieces are all traced individually, You need to separate them from the rest of the adhesive. Cut around your tracing lines, about 1/2 to 1 inch away from the lines. This doesn't need to be exact, just make sure there is space from the lines of the picture and your cut.

Step 4: Choose your fabrics.
This is my favorite part! Although be warned this could be very difficult if your design doesn't have a specific pattern it needs ( like the lady bug) and you have a lot of fabric options. Feel free to experiment with different fabrics. But b
eware of fabrics that fray because they often shred when laundered, and thicker fabrics like corduroy or velvet may be too difficult for some machines to handle smoothly. And make sure you wash and dry your fabrics before you work with them so they don't shrink after they've been attached to the clothing.

Step 5: Fuse the Fabric to the Material
Heat your iron according to the directions that came with the adhesive ( take this with a grain of salt, my iron needs to be WAY hotter than the instructions say, so test it at the instructed level first and then slowly increase as needed). When the iron is hot, place the preshrunk fabric right (front) side down on your ironing surface and press to remove any wrinkles. Be sure to put the side you want to use face down so you’re looking at the back of the fabric. Double and triple check before ironing. Really be careful when your using multiple fabrics where some are solid and don't have a "right" side and some are patterns and do, this can make it even more difficult to remember. Place the adhesive, paper side up, on the wrong (back) side of your fabric. Be sure to remove the cover from the the side of adhesive paper you're putting on the fabric, I know it sounds silly but when you're stressed during your first few times it very easy to forget. Fuse according to the directions that came with your adhesive.

Step 6: Cut out the sections
Cut out each section following the tracing lines CAREFULLY.

Step 7: Remove the adhesive backing
Carefully peel the backing from the design. If it's hard to remove the backing tear one side, or use your finger nail to separate it.

Step 8: Iron the applique to your item
Place the applique, adhesive side down, on the item you’re going to apply it to and arrange the sections to match your pattern. If you have several pieces you may need to look at the pattern to remember how the sections fit together. When the applique looks the way you want it to, iron it down according to the directions that came with the adhesive.

Remember how the pieces go!
Step 9: Add some details
Use the water soluble pens to draw in details that you are going to fill in with stitching later. (This is not shown, because the ladybug didn't have these details).
Step 10: Stabilize with interfacing
Cut a piece of tear-away interfacing large enough to cover the entire applique with a border of about 1/2 – 1 inch. Place the interfacing on the wrong side of the item you’re appliquing, under the applique. I like the iron-on stabilizers so thats what I use. If you use it to then just iron on the stabilizer like you did the initial applique. If you don't use it then you have to pin it in place.

Step 11: Stitch you Applique
For most appliques I prefer to hand stitch them because I feel I have more control of the movements, but if you want you can use a machine no problem. For those using the machine first, l
ine the applique up so the raw (unstitched) edge is in the middle of your presser foot and start stitching. Go slowly at first, until you gain some confidence. Slow down as you approach a curve or corner so you don’t overshoot the edge.
Remember to stitch the details you marked earlier. I generally narrow my stitch width by one setting for inner details. Remember to backstitch whenever you begin and end stitching so your stitching doesn’t come out later. When you're done make sure to trim your threads, before trimming make sure to tie your ends so they don't come undone, I also use some liquid no stitch to seal the ends to ensure nothing comes undone.

When you're done stitching you can then peel off the interfacing (not shown) and you'll have a nicely secured applique.
Layered Pant Cuffs
When I'm creating custom outfits for Isabella I really love to accent every possible piece of the item. One of my favorite parts to decorate are the cuffs of the pants. This is one of my favorite parts to decorate because I feel like this part is what ties the entire outfit together and makes it really pop. You have seen this in my pictures of the ladybug and Halloween customs in the Shop section of the blog, and now I am going to show you how to do them!


When I'm creating custom outfits for Isabella I really love to accent every possible piece of the item. One of my favorite parts to decorate are the cuffs of the pants. This is one of my favorite parts to decorate because I feel like this part is what ties the entire outfit together and makes it really pop. You have seen this in my pictures of the ladybug and Halloween customs in the Shop section of the blog, and now I am going to show you how to do them!
Step 1: Decide on layers and colors.
First you need to pick your fabric colors and then decide how many layers you want to put on the cuff. I suggest that you choose colors that accent your piece and aren't the primary colors, because you don't want to take away from any of the detailing but add to it. I usually do either one or three layers because any more are too difficult to sew onto the pants and I think that only doing two cuffs makes the piece look like its missing something. I only use one cuff if I want a small accent and I don't make the cuff any thicker than 1 in. *Make sure you wash your fabric and garments before beginning so they don't shrink*
Step 2: Cut your fabric
You next need to measure your fabric and cut it. They way I like to measure my fabric is to simply take it and loosely wrap it around the bottom of the pant leg I make sure that the ends touch and then I add one inch on one end of the fabric to guarantee I'll have enough, any extra I fold over and hem. For this outfit I made three cuffs, two orange sets and one black set. The bottom cuff was four inches, the second (black) cuff was three inches, and the top cuff was two inches high. You can adjust the heights depending on the length of the pant and how many cuffs your making.

4 in cuff: Bottom
3 in cuff: middle
2 in cuff: top
Step 3: Pin your hem
With this step you simply fold all around the cuff making sure to keep the folds equal all the way around and pin to keep in place. This will be your hem to make sure the fabric doesn't unravel and also keeps your cuffs sharp and defined so make sure your hems are EVEN.

Step 4: Begin to sew
Pick one side to begin sewing and place it under the foot of the sewing machine. Begin sewing your hem, removing each pin as the foot gets closer to it. Remember to backtrack on your first and last stitches to make sure they stay secure. NOTE: Make sure to test the color of your thread with your fabric so it doesn't show in your finished product. I learned this the hard way so I'm passing this knowledge on to you.


Step 5: Pin cuff to pants
Now there are two ways you can do this part. The first way is what I have shown below; with this method is I have hemmed all of my cuffs, layered them onto each other then stitched them together and then pinned the ONE cuff onto the pant leg. I find this easier for me because it helps me keep all the fabric lined up and even and prevents any slips. It also lets me trouble shoot and see any uneven areas before they're on the pants. The second method is to stitch each cuff on to the pants one at a time, you stitch everything the exact same but just to each cuff one at a time. This method is good if this is your first time doing the pant cuffs. This method lets you see exactly where everything is supposed to go on the leg and where everything is lined up. This is especially good for the new sewer who isn't able to visualize how the cuffs are supposed to be linked together and then on the pants.

Step 6: Stitching the cuff
We're almost done! If you're doing the first pinning method you have already stitched each cuff together and are now stitching the entire cuff as one piece onto the pants. If you are doing the second method you will stitch each cuff onto the pants individually. Either way, you will put the cuff under the machine foot and slowly stitch the top of the cuff only, removing each pin as the needle gets closer. Make sure you only stitch the top of the cuff, DON'T stitch the bottom of the cuff, these parts should stay free and open to give the pants a "flowy" look. If you end up having some left over fabric on the back of the cuff, simply fold the fabric over and stitch it to the pants like a hem.

The Finished Product!!!
